How to Make Layered SVG Files for Cricut: 3D Shadow Boxes and Paper Crafts
By Faisal | November 7, 2026 · 8 min read
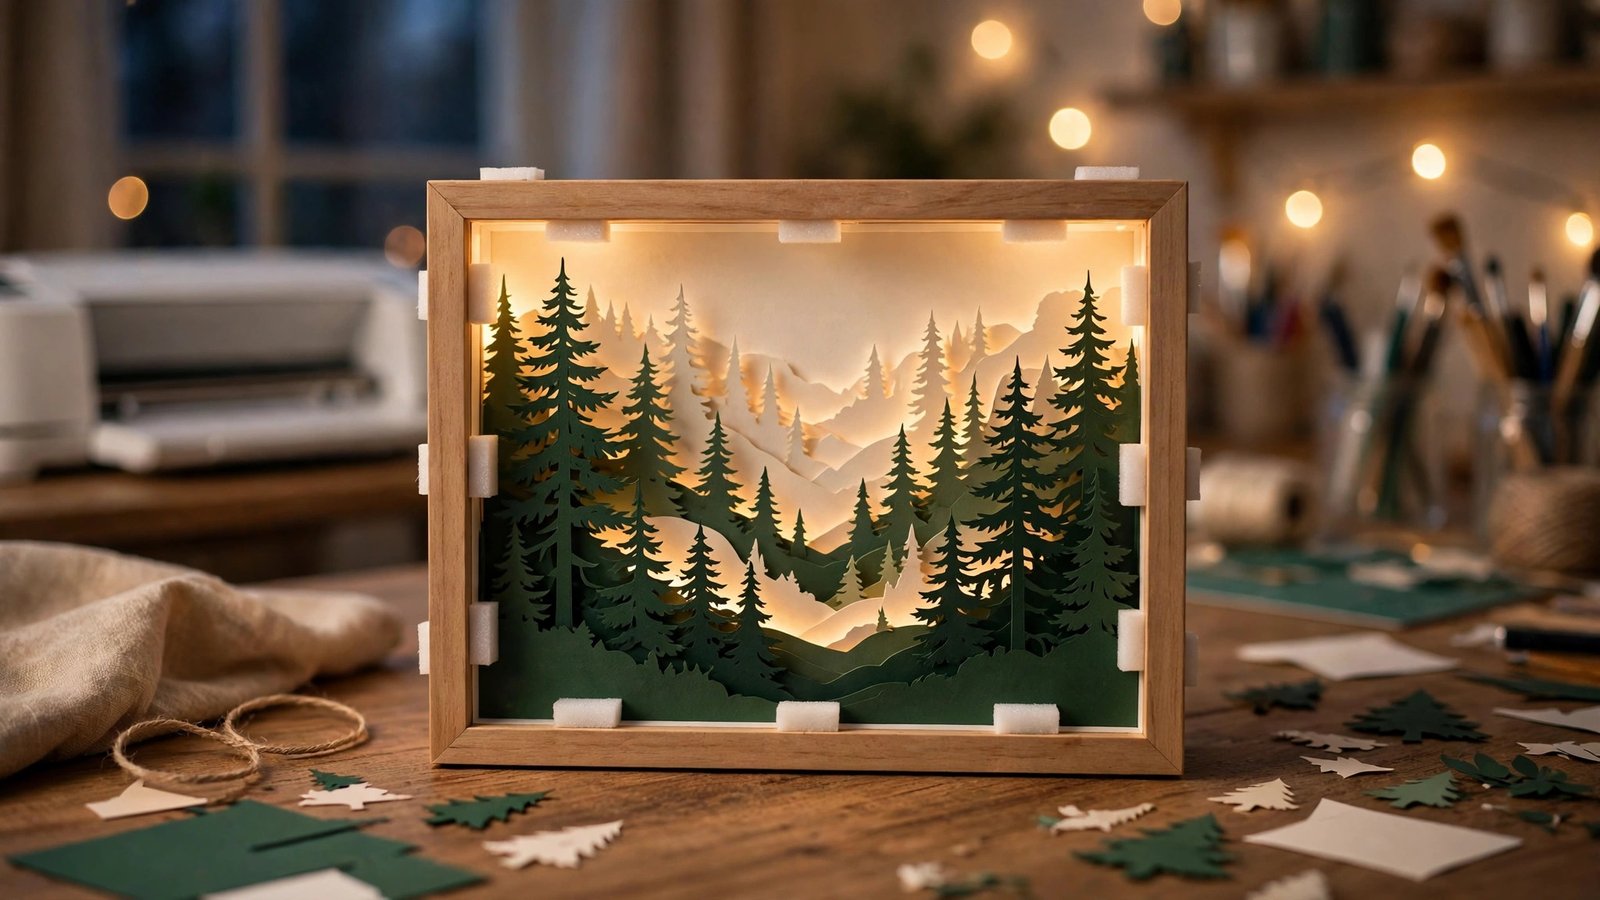
A shadow box looks like magic the first time you see one: a flat frame, and inside it a little forest that seems to stretch back for metres. There is no trick to it. A shadow box is a stack of flat sheets of cardstock, each cut into a different scene, with a small gap between each sheet. Your eye reads those gaps as depth. Every sheet is cut from its own SVG file, and once you understand the layers, you can design your own.
How a Layered Shadow Box Actually Works
Picture five to eight sheets of paper, all the same size, standing one behind the other inside a deep frame. The back sheet is a solid background. The sheet in front has windows cut out of it, so you see the background through the holes, and so on to the front, which is usually a frame. The gaps between the sheets — made with foam squares or foam tape — create the depth.
Two rules make or break a shadow box. First, every layer must share the same outer size, so the stack lines up. Second, each front layer should be mostly openings, not solid shapes — you are drawing the negative space that lets the layers behind show through. The back layer holds the colour, the middle layers hold the scenery, and the front layer holds the frame.
What You Need Before You Start
- A deep shadow box frame — at least 1.5 inches deep, so all the layers fit. Square 8 x 8 inch frames are the most common size.
- Cardstock, 65 to 80 lb (about 180–220 gsm), solid core if you can get it — one colour per layer. Lighter cardstock cuts fine detail more cleanly.
- Foam squares or foam tape for spacing, plus glue for flat joins.
- A Cricut machine (Maker, Explore, or Joy Xtra), a fine-point blade, and a StandardGrip mat. A LightGrip mat is better for very thin paper.
- Layered SVG files — one per layer. A typical first project has 5 or 6 layers.
- Optional: warm LED fairy lights to tuck behind the back layer.
Step 1: Plan Your Scene in Layers
Before you touch any software, sketch the scene on paper — one small rectangle per layer, back to front. For the winter forest at dusk in this guide, the plan looks like this:
| Layer (back → front) | What is on it | Colour |
|---|---|---|
| Layer 6 — back | Solid sky, with a moon cut as a circle | Deep navy |
| Layer 5 | Distant pine trees, small and simple | Dark teal |
| Layer 4 | Mid-distance trees and a small cabin | Forest green |
| Layer 3 | Large pine trees framing the sides | Mid green |
| Layer 2 | Snowy ground and a deer silhouette | White |
| Layer 1 — front | Border frame with pine branches in the corners | Dark green |
Notice the pattern: the back is solid, the middle layers get busier, and the front is a frame. Write the layer number on the back of each sheet in pencil as soon as it comes off the mat — this prevents stacking the layers in the wrong order.
Step 2: Turn Your Design Into Layered SVG Files
There are two ways to get layered SVGs. The first is to draw them from scratch in a vector editor: set the canvas to your frame size (8 x 8 inches), draw one layer per file, keep the outer rectangle identical, and export each layer as its own SVG, named layer01.svg through layer06.svg.
The second route is to convert an image into layered SVGs. Start with a high-contrast illustration, not a photograph, and separate it into flat colour areas first — one colour per layer. Then convert each area with a browser converter like the one at imagetosvg.net: set Colors to match the flat colours (usually 2), use the Stencil preset, and set Path Omit to 10–15. Preview each layer before you download it: are the paths closed, and does it still have its outer rectangle?
Step 3: Upload and Prepare the Layers in Cricut Design Space
- Open Cricut Design Space, start a new project, and click Upload, then Upload Image. Choose your first layer SVG.
- Check the size immediately: select the whole design and set its width to your frame's inner size — about 7.5 inches for an 8 x 8 inch frame. Keep the size identical across all layers.
- Recolour the layers in Design Space to match your cardstock, using the colour box at the top. This lets you see the finished scene on screen before you cut, and stops you cutting the sky in green by mistake.
- Ungroup a layer only if you need to delete a stray shape. Otherwise, leave the grouping alone.
- Repeat for each layer, and cut one layer at a time — you need a different colour of cardstock for each one anyway.
Step 4: Cut the Layers
Load one sheet of cardstock on the green StandardGrip mat, smooth it down firmly, and select the Cardstock material setting in Design Space. For 65 lb cardstock, the "Medium Cardstock" setting with more pressure is a good starting point. Always do a test cut on scrap first.
Check each layer as it comes off the mat: are the small windows fully cut through, are any thin pieces torn, and is the outer edge intact? If a layer tears, the cause is usually a dull blade, a mat that is too sticky, or detail too small — enlarge the design, or simplify the smallest shapes. Stack the finished layers in order, numbers facing up.
Step 5: Assemble the Shadow Box
Start with the back layer and work forward. Place foam squares around the edges of the back sheet, and a few in the middle where the paper might sag, then press the next layer on top, lining up the outer edges. The foam is the depth — one square thick between most layers, two between the front layers. Keep going, one layer at a time.
When the stack is complete, slide it into the frame. Leave the glass out — glass adds reflections that hide the depth. If you are adding LED lights, tuck the strip behind the back layer, with the battery pack hidden at the back. If one layer looks wrong, it is almost always the spacing — add a second foam square.
Troubleshooting: Common Layered SVG Problems
The layers do not line up
One layer was exported or resized at a different size. In Design Space, set every layer to the exact same width and height, and check that each still has its outer rectangle.
Small pieces tear or go missing
The detail is too small, the blade is dull, or the pressure is too high. Enlarge the design, simplify the smallest windows, try a fresh fine-point blade, and use a LightGrip mat for thin paper.
The finished box looks flat
The gaps are too small, or a layer is stuck flat against the one behind it. Add a second foam square between layers, especially at the front, and put foam at the edges and in the middle.
Design Space will not open my SVG
Check that the file is a real traced SVG with closed paths, not a JPG wrapped inside an SVG file, with no gradients, patterns, or embedded images. Simplify it — two colours, closed paths, no effects — and try again.
The colours look wrong when assembled
You cut a layer in the wrong colour. Recolour the layers in Design Space to match the actual cardstock before cutting, and number each sheet in pencil as it comes off the mat.
Tips for Shadow Boxes That Sell or Gift Well
- Start with five or six layers. Sixteen-layer designs look spectacular, but they are a second or third project, not a first.
- Pick a theme people already love. Winter forests, gnomes, baby names, and wedding dates are popular — they are gifts, and gifts need a clear occasion.
- Keep the front layer simple. A bold border frames the scene; a busy front layer hides everything behind it.
- Photograph it in low light. Shadow boxes look best in the evening, with the LED lights on and no flash.
- Only use images you have the right to sell. Converting someone else's artwork and selling the result is not yours to sell. Draw your own scenes, or use artwork you created or licensed.
Frequently Asked Questions
How many layers does a shadow box need?
Five to nine layers is typical, and five or six is a good starting point. More layers add depth, but each extra layer is another cut and another chance to mix up the order.
What size should my layered SVG be?
Match your frame. For the common 8 x 8 inch frame, cut the layers at about 7.5 inches square, so the stack fits inside without buckling. Every layer must be exactly the same size.
Can I use a JPG instead of an SVG for a shadow box?
Not for cutting. A JPG is pixels, and a cutting machine needs paths. Convert the image to a traced SVG first — one SVG per layer, with flat colours and closed paths.
What cardstock is best for layered SVG projects?
Solid-core cardstock, 65 to 80 lb, cuts fine details cleanly without tearing. Very thick cardstock can tear in small areas, and thin paper tears on a standard mat — use a LightGrip mat. Do a test cut on scrap first.
Do I need a Cricut to make a shadow box?
No, but it helps enormously. You can cut layers by hand, or use a Silhouette or a laser cutter — the layer system is the same. A machine just makes the fine windows and thin branches practical.
Final Verdict & Summary
A layered shadow box is a stack of simple ideas: one scene, split into five or six flat layers, each cut from its own SVG, spaced apart with foam so your eye reads depth. Plan the scene back to front, keep every layer the same size, and assemble from the back forward. Your first box will not be perfect — by the third, you will be designing scenes of your own.
Need clean SVGs for your next layer?
Try our free, browser-based converter. Upload any PNG, JPG, or GIF and generate clean SVG vector paths instantly without registration.
Open the Free Converter →